The scope came with a nice case, several eyepieces, a barlow and a clamshell mount with a solranger spotter. What wasn't apparent at the time of purchase was how it would mount to my CGEM, there was no mention of anything outside of the clamshell mount.
So here is what I did to mount the scope:
Purchased the following:
- Aluminum door threshold ($9.99)
- a pair of knobs ($2.00 for the pair)

Next I cut and removed burs from the mount plate:


I painted the new mount plate a semi-gloss black to kind of match the CGEM as well as the black parts of the scope. In the image below you can see it mounted to the CGEM and scope mounted on it. You can also see the placement of the knobs and see how they might be helpful if the mount starts to slip from the mount head.

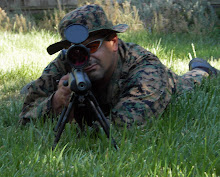
The image below shows the mount and scope as it is tracking the sun.

Here is a link to my first light video I got from the setup:
I used an Orion Starshoot Planetary imager for this image, I will be creating a way to mount my other cameras that should provide a greater level of detail than the 640p image provided in this imager. I found that the level of detail provided in the video is about 100x less than what you are able to see visually. If you have never looked through one of these scopes... it will take your breath away.
As a final note: I was initially somewhat concerned about the stability of the choice of materials, but after hours of visual use, tracking for 3 hours and my first video, I believe the mount plate will prove to be a very acceptable part of this setup and at about 6x less cost than a mass produced mount plate.
Happy Photon Hunting!